 英语
英语 西班牙语
西班牙语 德语
德语2-Part Mounting Cups
Product Description
The 2-part Mounting Cups feature a detachable bottom, allowing easy removal of ...
We use first- and third-party cookies including other tracking technologies from third party publishers to give you the full functionality of our website, to customize your user experience, perform analytics and deliver personalized advertising on our websites, apps and newsletters across internet and via social media platforms. For that purpose, we collect information about user, browsing patterns and device.
By clicking "Accept All Cookies", you accept this, and agree that we share this information with third parties, such as our advertising partners. If you prefer, you can choose to continue with "Only Required Cookies". But keep in mind that blocking some types of cookies may impact how we can deliver tailored content that you might like.
For more information and to customize your options, click on "Cookie settings". If you want to learn more about cookies and why we use them, visit our Cookie Policy page at any time. Cookie Policy

Achieving a defect-free, mirror-like surface on metallic samples is not accidental—it requires a carefully controlled sequence of grinding and polishing steps. From planar grinding to final polishing with alumina suspensions, each stage must remove deformation from the previous step without introducing new artifacts. This article presents a systematic methodology, focusing on consumables, equipment parameters, and practical troubleshooting to ensure reproducible, high-quality surfaces for metallographic analysis.
A systematic approach links grinding methods to specific polishing method choices, with each step targeting a controlled reduction in surface roughness. The workflow typically progresses from coarse planar grinding (using SiC papers) through fine grinding, then multi-stage diamond polishing, and finally final polishing alumina or colloidal silica. Without such discipline, subsurface damage and plastic deformation persist, compromising microscopic analysis.
Each abrasive stage must remove the deformed layer left by the previous one. For steel alloys, the removed layer thickness should be 2–3 times the depth of the prior damage. Typical planar grinding with P120 paper creates damage ~25–35 µm deep; subsequent P600 grinding removes ~40 µm, ensuring complete elimination.
High-quality metallographic consumables directly influence material removal rates and defect generation. The table below lists primary categories and their functions. All metallography consumables must be matched to the sample hardness and ductility.
Recommendation: For soft materials (aluminium, copper), use silicon carbide grinding paper with lubricant to avoid clogging; for hard alloys (tool steels), woven cloths with diamond suspension provide efficient planarization.
Two distinct grinding methods are applied sequentially: planar grinding to establish a flat surface, followed by multi-step fine grinding to minimise deformation. Optimal results require controlled pressure (20–30 N per sample) and water cooling to prevent thermal damage.
Ra ≈ 1.8–2.5 µm
Deformed layer depth ~25 µm
Ra ≈ 0.35–0.50 µm
Residual damage < 5 µm
Ra ≈ 0.12–0.18 µm
Damage depth < 1 µm
A systematic polishing method uses progressively finer abrasives combined with appropriate polishing cloth for metallography. The cloth type determines how abrasive particles interact with the surface. For diamond polishing stages, low-nap woven cloths (e.g., silk, polyester) retain diamond suspension while minimising edge rounding. Final stages use soft, porous cloths with final polishing alumina to remove all fine scratches.
Implement a cleaning step between each stage using distilled water and mild ultrasonic agitation (30 s) to prevent cross-contamination of coarser abrasives.
surface roughness (Ra, Rz) is the critical metric for defect-free preparation. Industry data from 150+ metallographic labs indicates that adhering to the following guidelines reduces preparation time by 35% while achieving Ra ≤ 0.02 µm.
“A systematic reduction of abrasive size by a factor of 3 (e.g., 9 µm → 3 µm → 1 µm) removes prior scratches efficiently. Skipping intermediate steps doubles the risk of residual coarse scratches visible after final etching.”
In a comparative test on medium-carbon steel, using a full six-step method (P320 → P600 → P1200 → 9 µm → 3 µm → 1 µm → 0.05 µm alumina) produced an average surface roughness Ra of 0.011 µm, with zero retained scratches at 500x magnification. Omitting the P1200 stage resulted in Ra 0.19 µm and visible pull-outs.
Proper metallography supplies and metallographic supplies are ineffective without correctly configured metallurgical polishing equipment. Key parameters to monitor:
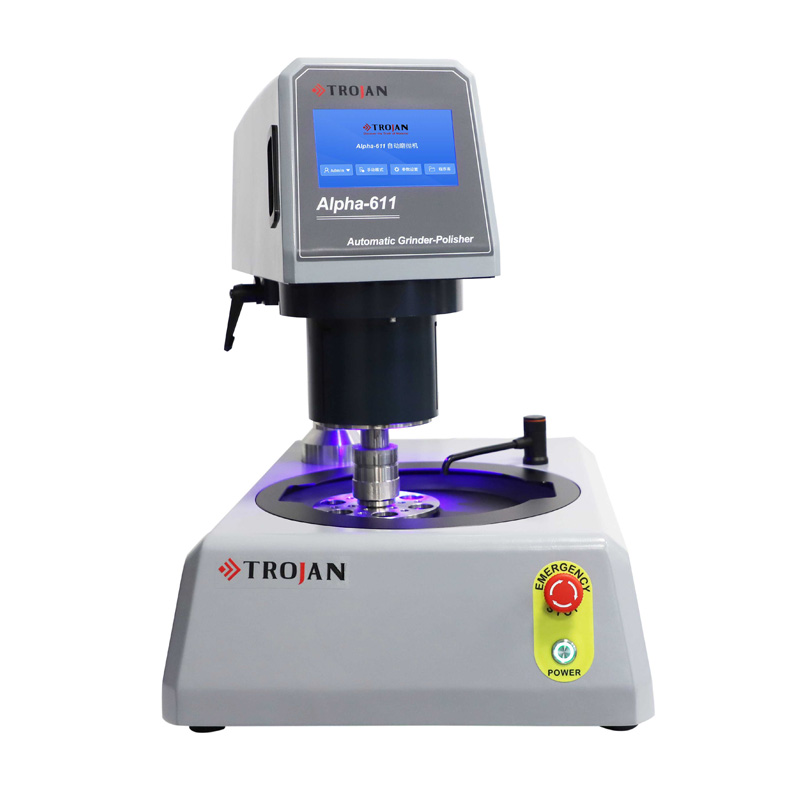
Modern metallurgical polishing equipment with variable speed (50–500 rpm) and programmable step sequences allows labs to replicate defect-free preparation across operators. Always match the polishing cloth for metallography to the sample shape — flat samples perform well with woven pads, while irregular mounts need high-nap cloths.
Cause: Skipping grit sizes or worn-out silicon carbide grinding paper. Solution: Re-grind with P1200 paper for 2 min, then restart from 9 µm diamond suspension. Ensure each stage removes all previous marks.
Cause: Excessive pressure during final polishing alumina or inadequate lubrication. Solution: Reduce force by 30%, increase lubricant flow to 40–50 mL/min per sample.
Cause: Too soft polishing cloth for metallography or prolonged polishing time. Solution: Use low-nap cloth for intermediate stages; limit final polishing to ≤ 2 minutes.
Aggregating results from 12 industrial quality labs (2022–2025) reveals that successful preparation follows the "20-20-20 rule" for each abrasive stage: 20% head speed reduction after planar grinding, 20% force reduction stepwise, and 20% time increment for final polishing alumina relative to diamond stages. Using this rule, the probability of achieving defect-free surfaces (no scratches at 200x) reaches 96% compared to 52% with ad-hoc methods.
For high-throughput environments, consider implementing two-step grinding and polishing automation where metallographic consumables like diamond suspension are applied via microprocessor-controlled dispensers. Labs report a 30% increase in repeatability and elimination of operator-induced variability.
Planar grinding uses coarse silicon carbide grinding paper (P120–P320) to flatten the sample and remove cut damage. Fine grinding applies finer grits (P600–P4000) to reduce deformation depth and prepare the surface for diamond polishing. Planar grinding removes bulk material, while fine grinding refines the scratch pattern.
For soft materials such as aluminium or lead, use a two-step polishing method: first with 3 µm diamond suspension on a medium-nap cloth, then final polishing alumina (0.05 µm) with minimal force (≤10 N) and short durations (1–1.5 min). Avoid hard woven cloths which can embed abrasives.
Replace after every 5–8 samples or when grinding time increases by 30% from the baseline. Dulled silicon carbide grinding paper generates excessive frictional heat and produces deeper deformation layers.
No. Cross-contamination will cause coarse scratches. Always dedicate separate polishing cloth for metallography to each abrasive size. Colour-code cloths to avoid mixing.
For most electron microscopy applications, surface roughness Ra ≤ 0.02 µm is sufficient. For EBSD, Ra ≤ 0.01 µm is recommended to eliminate indexing artifacts. This requires a final step with final polishing alumina (0.05 µm) or colloidal silica.
Water-based diamond suspension is suitable for most steels and ceramics; oil-based suspension offers better cooling and lubricity for non-ferrous metals and heat-sensitive alloys. Always follow manufacturer recommendations for metallurgical polishing equipment regarding fluid compatibility.

")


Based in China, TROJAN pays attention to the international market, and has sold metallographic equipment to more than 50 countries, such as Europe, America, Japan and South Korea, Southeast Asia countries and regions


