 中文简体
中文简体 英语
英语 西班牙语
西班牙语 德语
德语CT-250S/CT-250V Manual Cut-Off Machine
CT-250S/CT-250V is a manual cut-off machine, which designed according to the principles of safety an...
We use first- and third-party cookies including other tracking technologies from third party publishers to give you the full functionality of our website, to customize your user experience, perform analytics and deliver personalized advertising on our websites, apps and newsletters across internet and via social media platforms. For that purpose, we collect information about user, browsing patterns and device.
By clicking "Accept All Cookies", you accept this, and agree that we share this information with third parties, such as our advertising partners. If you prefer, you can choose to continue with "Only Required Cookies". But keep in mind that blocking some types of cookies may impact how we can deliver tailored content that you might like.
For more information and to customize your options, click on "Cookie settings". If you want to learn more about cookies and why we use them, visit our Cookie Policy page at any time. Cookie Policy

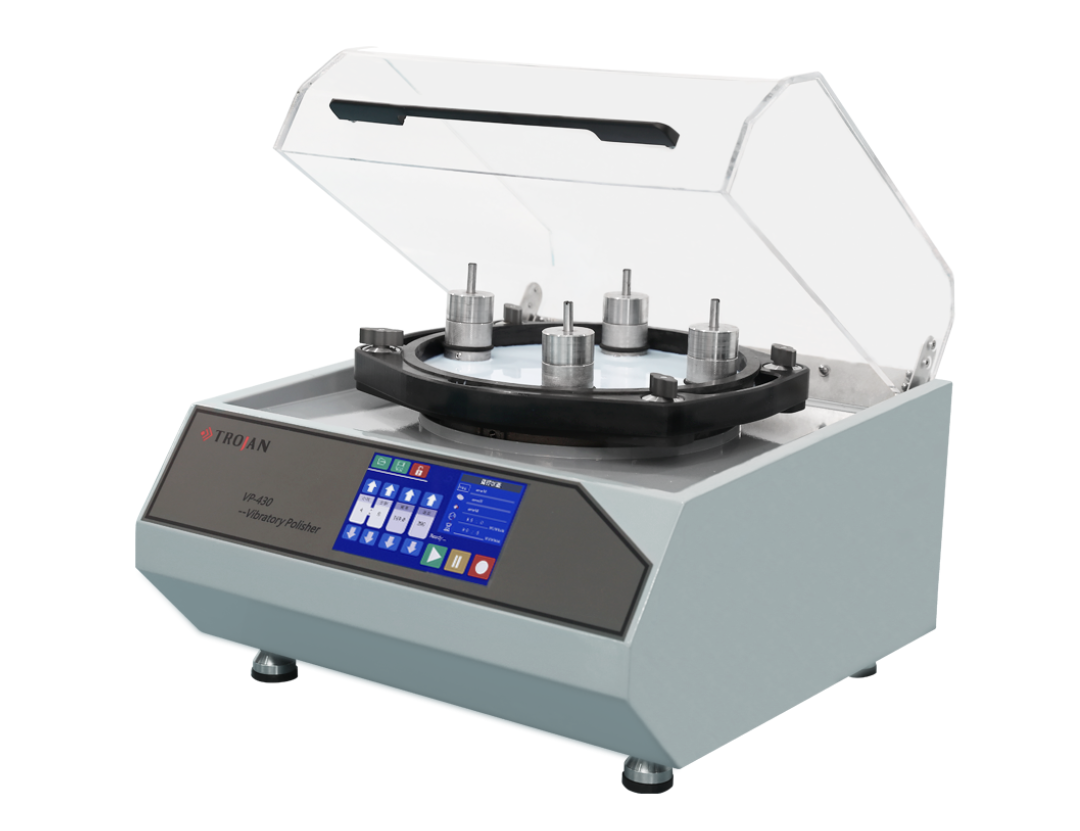
Vibration polishing can quickly remove tiny scratches and deformation layers left on the surface of the sample due to mechanical polishing, so as to obtain a smooth and stress-free surface that meets the standards of EBSD or AFM samples. Compared with electrolytic polishing and ion polishing, vibration polishing has wider applicability. It does not require highly corrosive and explosive electrolytes, nor expensive equipment, and is applicable to any material or mixture of materials.
The Trojan VP-430 Vibratory Polisher maximizes the time the sample is in contact with the polishing cloth by using a special vibrating motor that can generate almost completely horizontal vibration (movement in X, Y directions). At the same time, this nearly completely horizontal vibration can more effectively remove the deformed layer on the surface of the material.
01 Steps before vibration polishing
Before vibration polishing, it is necessary to prepare metallographic samples with high quality to the greatest extent, so as to enter the vibration polishing process. Need to point out a misunderstanding is that vibration polishing is not a substitute for mechanical polishing, vibration polishing is used to remove its surface after the completion of the mechanical preparation method due to mechanical polishing of the small scratches and deformation layer to eliminate surface stress. Only when the previous mechanical polishing is done in high quality, the subsequent vibration polishing can be carried out successfully and efficiently, otherwise the desired result will not be obtained.
For the mechanical preparation methods of various materials, please refer to the relevant technical documents issued by Trojan.
02 Vibration polishing
Polishing fluid and polishing cloth
Vibratory polishing can be performed using a diamond slurry or oxide suspension with a particle size between 0.02 and 1 μm, the same polishing suspension used in the final stage of the standard mechanical preparation method is recommended. The most commonly used polishing fluid is silica polishing fluid. Due to the long time of vibration polishing, the solvent of the polishing liquid may evaporate and cause dryness or crystallization, so pay attention to keep the polishing cloth wet throughout the polishing cycle. A low-to-medium nap cloth is generally used because the fibers in the cloth facilitate movement of the sample across the polishing surface and help ensure an even polish. The surface quality of the polishing cloth is the basis for perfect vibration polishing. Therefore, this step is particularly important for thorough cleaning of the polishing cloth after use. If it is not cleaned in time after use, the residue and crystal particles of polishing liquid left in the working container of the vibration polishing machine will affect the normal use next time.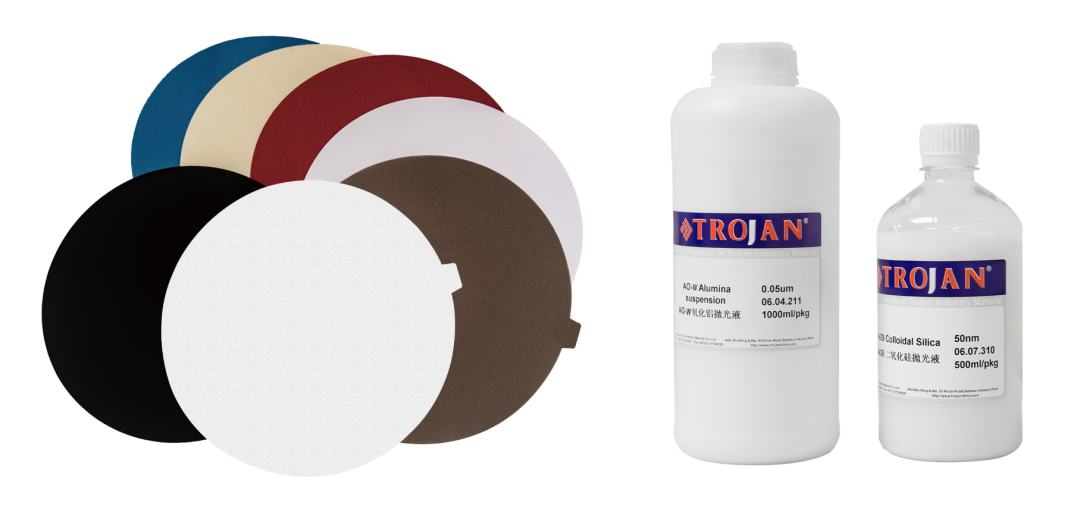
Pressure
The sample preparation pressure is the gravity of the sample itself or the gravity of an additional weight. In order to obtain better vibration in the horizontal direction, it is generally necessary to add a certain weight to the inlaid sample. The weight is usually determined by the size of the contact area of the sample and the hardness of the sample. The larger the contact area, the greater the weight should be. The sample must be sufficiently hard and should normally have a minimum total mass of 0.4 kg. If the weight is too low, the sample may be corroded or contaminated during the polishing process.
Take a sample with a diameter of 30mm as an example:
For samples of cast iron, aluminum alloy and other non-ferrous metals with low hardness, in addition to using the fixture, one counterweight can be added (each counterweight weighs 300g);
Medium hardness steel can add two 2 weights;
Harder carbide and ceramic materials require 2 to 3 additional weights.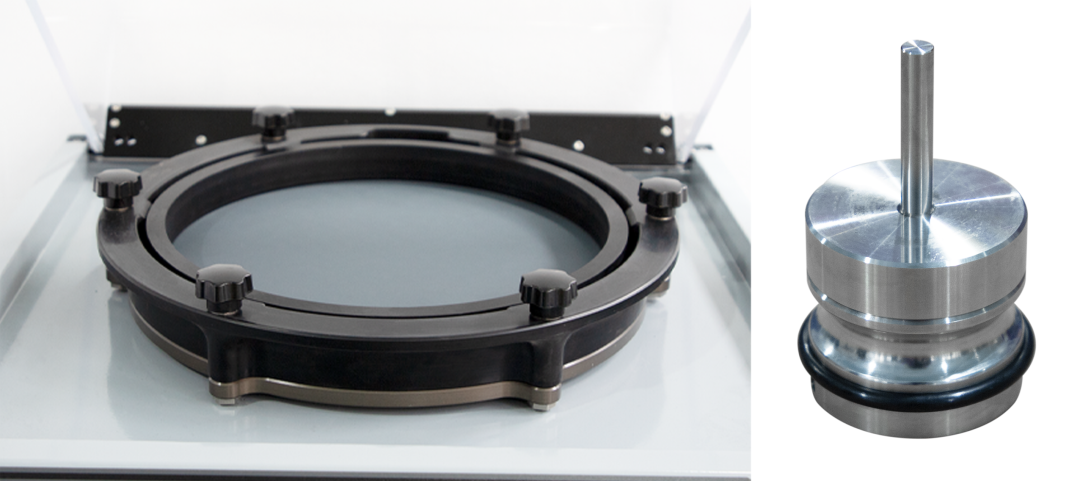
Frequency and Amplitude
The frequency of vibration polishing is generally constant, and the parameters that need to be set are generally amplitude and time.
Amplitude values sufficient to rotate the specimen around the edge of the polishing disc is enough. The rotation speed should be 6~10rpm. The rotation speed is not critical, but the consistent motion is. If the movement is not in the correct area, the center of gravity of the sample needs to be adjusted so that the sample moves along the largest diameter of the polishing bowl.
Time
Vibration polishing is carried out for a long time (>30Min), the user can let it run automatically after setting the parameters. There is no fixed rule for the duration of vibratory polishing as it depends on many factors. One of the main factors is the amplitude strength that can be adjusted on the unit. Changes in this value in intensity, or vibration intensity, directly affect polishing time. The time can be determined empirically when working with new or unknown materials. Typically, with proper polishing conditions, noticeable improvements after vibratory polishing can be seen within 30 minutes. Samples can be examined under an optical microscope or a scanning electron microscope. If the polishing quality is not perfect, repeat the polishing cycle or modify the polishing conditions.
Recommended polishing time:
Samples with low hardness (non-ferrous metals, etc.) need to vibrate for 90min~180min;
Materials with medium hardness (low, medium and high carbon steel, etc.) need to vibrate for 60min~120min;
Materials with higher hardness (tungsten carbide, etc.) need to vibrate for 30min~60min.
When preparing for the first time, it is recommended to observe the preparation of the sample every 30 minutes as a time interval to obtain the best efficiency under the premise of meeting the requirements.
03 Common material vibration polishing parameters table
|
Matreial |
Polishing cloth |
Polishing fluid |
Loading |
Amplitude |
Time |
|
Aluminum, Copper, |
YR |
Silica |
1 weight |
6~10rpm |
90min~180min |
|
Low, medium and high carbon steel, quenched and tempered steel |
YR |
Silica |
2 weights |
6~10rpm |
60min~120min |
|
Carbide |
YR |
Silica |
3 weights |
6~10rpm |
30min~60min |
|
Note: The above parameters are applicable to φ30mm sample; |
|||||


")
")

.jpg?imageView2/2/w/400/format/jpg/q/75 "MD-W Monocrystalline Diamond Suspension")


Basing on China, TROJAN has a strong focus on international sales, for now ,TROJAN has sold our metallographic equipment to more than 40 countries, such as Europe, U.S.A, Korea and Southeast Asia.


Copyright 2021 Trojan (Suzhou) material technology Co., Ltd.
 metallographic equipment manufacturers custom metallurgical equipment suppliers

