
 英语
 西班牙语
 德语
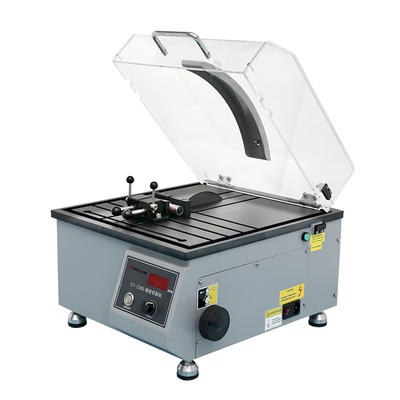
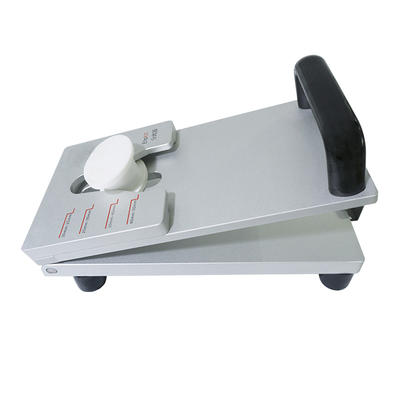
CT-2300 Manual Cut-off Machine
Product Description
CT-2300 is a compact, desktop Manual Cut-off Machine,widely used for cutting mat...
We use first- and third-party cookies including other tracking technologies from third party publishers to give you the full functionality of our website, to customize your user experience, perform analytics and deliver personalized advertising on our websites, apps and newsletters across internet and via social media platforms. For that purpose, we collect information about user, browsing patterns and device.
By clicking "Accept All Cookies", you accept this, and agree that we share this information with third parties, such as our advertising partners. If you prefer, you can choose to continue with "Only Required Cookies". But keep in mind that blocking some types of cookies may impact how we can deliver tailored content that you might like.
For more information and to customize your options, click on "Cookie settings". If you want to learn more about cookies and why we use them, visit our Cookie Policy page at any time. Cookie Policy

A heat-treatment laboratory received a batch of carburized gear samples for case-depth verification. The technician hot-mounted them in a general-purpose phenolic resin, ground and polished to a 1 µm finish, and placed the first mount under the microscope. The case layer was visible, but the edges were rounded, the hardness indentations near the edge fell outside the acceptable zone, and a thin dark gap had opened between the steel and the resin. The preparation recipe had not changed in months, yet the mounts were unusable.
Hot mounting resin problems are rarely random. In our daily work with metallographic labs, most defects trace back to five recurring causes: resin hardness mismatched to the sample, incorrect pressure or temperature, moisture or contamination trapped at the interface, under- or over-curing, and poor mold or charge preparation. When you recognize the pattern, the correction is usually simple.
Mounting defects usually appear after grinding and polishing, not during the mounting step itself. These are the failures we see most often in routine production and quality-control labs:
Edge rounding is the most common complaint, and the root cause is almost always a wear-rate mismatch. During grinding, the abrasive removes the softer material faster. If the resin is much softer than the sample, the resin recedes and stops supporting the sample edge, so the edge rounds off. If the sample is soft, for example copper or aluminum, and the resin is very hard, the sample wears faster and becomes concave.
The fastest way to reduce edge rounding is to match the mounting resin hardness to the sample hardness, then control grinding force.
For hardened steels, carburized layers, and coated components where edge retention is critical, a general-purpose phenolic resin is usually too soft. A glass- or mineral-filled epoxy resin wears at a rate much closer to steel and holds the edge through the complete grinding sequence. For routine ferrous batches where cost matters, start with a filled epoxy and verify the edge profile on your first mount.
If you are new to hot mounting or want to confirm your process parameters, our guide on using hot mounting consumables covers pressure, temperature, and dwell time for each resin family.
Every thermosetting resin shrinks as it polymerizes. A thin, uniform gap is acceptable in many applications, but a large separation or a row of voids at the interface will ruin edge measurements and can trap polishing debris. The usual contributors are:
The fix is straightforward: clean and dry the sample thoroughly, preheat the mold cylinder, apply the rated pressure, and keep the pressure on until the mount cools below roughly 40 to 50 °C. For ferrous samples with demanding edge requirements, a phenolic edge-protection resin provides lower shrinkage and better interfacial adhesion than ordinary phenolic grades.
Hot mounting applies heat by design, but exceeding the resin window damages both the resin and the sample. Clear warning signs are a brown or black halo around the sample, a soft or sticky resin surface, and in severe cases a microstructure that has been tempered or transformed by excessive heat.
The common causes are a set temperature above the resin rating, a curing cycle that runs too long, or a heating platen whose temperature sensor has drifted. Check the resin data sheet, reduce the temperature by 10 to 20 °C if you see discoloration, and verify platen calibration every few months. Some resins, such as acrylic and certain edge-protection grades, are more sensitive to overheating than standard phenolic, so read the recommended window before changing resin type.
Choose the resin according to the sample hardness, the features you must preserve, and the analysis you will run after mounting. The table below summarizes the main hot mounting resin families and their typical uses.
| Resin type | Hardness | Edge retention | Typical cycle | Best suited for |
|---|---|---|---|---|
| General-purpose phenolic | Medium | Good | 150-180 °C, 5-8 min | Routine steels, high-volume batch work |
| Phenolic edge-protection | High | Excellent | 150-180 °C, 6-8 min | Edge-critical ferrous samples |
| Epoxy, glass or mineral filled | High | Excellent | 150-200 °C, 6-10 min | Hardened steels, carburized and coated layers |
| Melamine, mineral filled | High | Very good | 150-190 °C, 5-8 min | Hard, brittle, or abrasive samples |
| Graphite conductive | Medium | Good | 150-180 °C, 6-8 min | SEM and EDS analysis requiring conductivity |
| Transparent acrylic | Low to medium | Fair | 140-180 °C, 5-7 min | Layer thickness and coating inspection |
A mineral-filled melamine resin is a strong choice when the sample itself is hard and abrasive, because the filler keeps the resin from polishing faster than the material you need to examine.
When a defect appears, work backwards from the symptom to the process variable. This table covers the most frequent combinations we see.
| Symptom | Most likely cause | Corrective action |
|---|---|---|
| Edge rounding | Resin softer than the sample; excessive grinding force | Use filled epoxy or melamine; reduce grinding load |
| Gap between sample and resin | Shrinkage; oily or wet sample surface | Clean and dry the sample; increase pressure; cool under pressure |
| Voids near the sample | Moisture; trapped air; low pressure | Dry the sample; preheat the mold; raise the pressure |
| Burn marks or dark halo | Temperature too high; cycle too long | Lower the temperature; shorten the cycle; check heater calibration |
| Soft mount with heavy scratches | Under-curing; expired resin | Increase time or temperature; check resin shelf life |
| Flash or resin overflow | Overfilled mold; worn mold seal | Reduce the resin charge; inspect or replace the mold |
Prevention is faster than rework. These habits eliminate most hot mounting defects before they appear.
For a complete view of the preparation workflow, from sectioning to final polishing, see our sample preparation overview.
If the resin hardness is no longer the limitation, check the grinding step. Excessive force at the coarse grinding stage removes both materials quickly, but it can still deform the edge before the resin has a chance to support it. Reduce the load and make sure the platen is flat and the abrasive is fresh.
Use enough resin to leave 8 to 12 mm of resin around and above the sample. Too little resin gives a thin mount that lacks mechanical support; too much extends the curing time and increases shrinkage stress.
No. Thermosetting resins cure irreversibly; once cured, they cannot be remelted or reused. Reusing chunks of cured resin creates voids and weak interfaces.
Cold mounting avoids pressure and heat, so it is safer for soft, thin, or polymeric samples. Use hot mounting when you need maximum edge retention and hardness for metals that tolerate the temperature.
Most hot mounting resin problems are predictable and preventable. Match the resin to the sample hardness, control the four key variables of pressure, temperature, time, and cooling, and record what you do on every batch. When a defect does appear, use the symptom tables above to isolate the cause instead of changing the whole process.
If you work with difficult materials or need a resin recommendation for a specific application, a mounting application guide based on real production samples is often the fastest way to a reliable process. Consistent mounts are the foundation of every trustworthy hardness test and microstructural evaluation.



Based in China, TROJAN pays attention to the international market, and has sold metallographic equipment to more than 50 countries, such as Europe, America, Japan and South Korea, Southeast Asia countries and regions


